
At its core, food safety temperature control is all about one thing: keeping food out of the “Temperature Danger Zone.” This means keeping hot foods hot and cold foods cold. It’s the most fundamental practice in any kitchen for preventing the growth of nasty bacteria that can make people sick. Get this right, and you’re protecting not just your customers, but your business’s reputation.
The Unseen Risk in Every Kitchen
In the hustle of a commercial kitchen, temperature control is your invisible shield. It’s what stands between your customers, your brand, and a serious food safety crisis. We’re not just talking about following a few rules on a checklist; this is about actively managing a critical risk that’s present every single minute of the day. A few degrees off can be the difference between a memorable meal and a public health nightmare.
Think of it this way: improper temperatures create a superhighway for bacteria. When food sits in that danger zone, even for a little while, you’re basically rolling out the red carpet for pathogens like Salmonella and E. coli. A simple oversight in the kitchen can quickly lead to a severe foodborne illness outbreak.
Why Temperature Management Is Non-Negotiable
Dropping the ball on temperature control has consequences that ripple through your entire operation, and they’re not pretty. It goes way beyond the immediate threat of making someone sick. These aren’t just hypotheticals—they are the real-world outcomes that kitchens face every day.
Globally, an estimated 600 million people get sick each year from contaminated food. That’s about 1 in every 10 people. Improper temperature control is a huge part of that problem and one of the most common critical violations health inspectors find. The World Health Organization lays out the full scale of these challenges, and it’s a sobering read.
A single temperature failure can set off a chain reaction: you’re tossing out expensive inventory, facing potential lawsuits, and dealing with the kind of damage to your reputation that can take years to repair—if ever.
The Foundation of a Safer Kitchen
Truly mastering temperature control means being proactive, not just reactive. You need to build systems that stop problems before they even have a chance to start. It all comes down to a few core principles that should be the bedrock of your kitchen’s food safety plan.
The key pillars of rock-solid temperature control include:
- Understanding the Danger Zone: You have to know the exact temperature range where bacteria throw a party. That’s the first step to shutting it down.
- Having Corrective Actions Ready: What do you do when a fridge is too warm or the soup on the line drops below temp? A clear, pre-planned response is essential.
- Monitoring, Monitoring, Monitoring: Using the right thermometers and keeping consistent logs at every stage—from delivery to service—is non-negotiable.
When you really embrace these fundamentals, temperature management stops being a chore and becomes one of your most powerful strategies for success. This guide will take you beyond just memorizing regulations and give you the actionable steps to build a real food safety culture in your kitchen.
Navigating the Temperature Danger Zone
Think of the Temperature Danger Zone (TDZ) as the “red zone” for food. This critical range, spanning from 40°F to 140°F (5°C to 60°C), is where harmful bacteria like Salmonella, E. coli, and Listeria don’t just survive—they thrive. Keeping food out of this zone isn’t just about passing a health inspection; it’s the core of preventing foodborne illness.
Once a food’s temperature falls into this range, a safety clock starts ticking. A single bacterium can multiply into two in just 20 minutes. Left unchecked for a few hours, that one cell can explode into millions, turning a safe dish into a serious health risk.
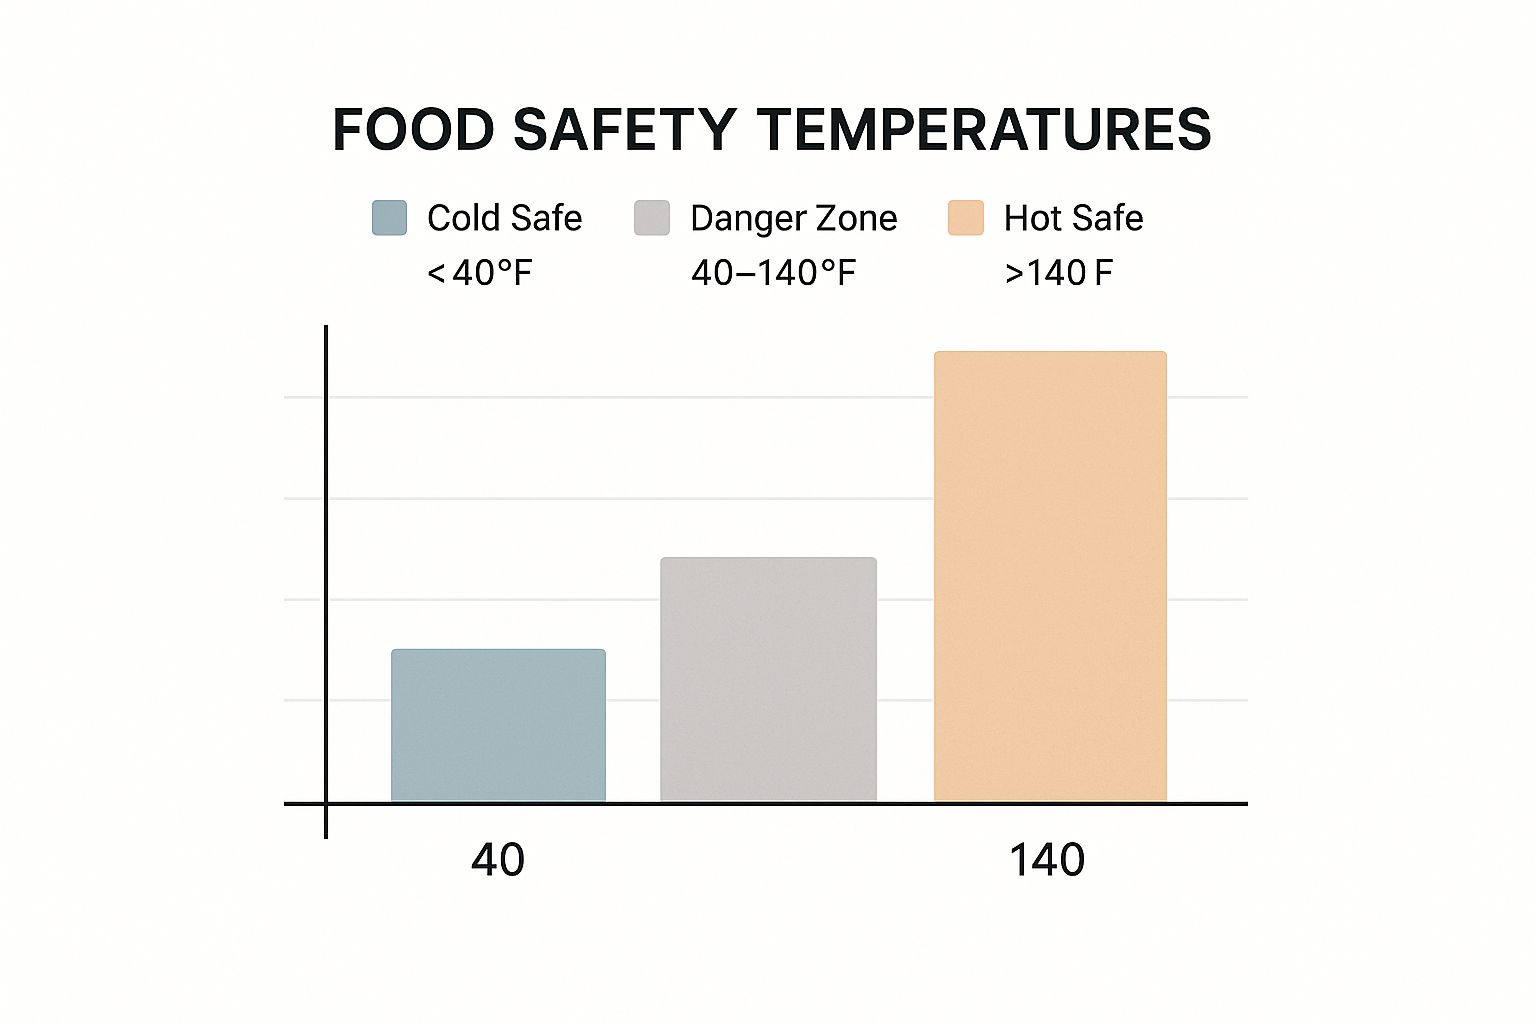
This visual makes it crystal clear: there’s no gray area. Food is either safely cold, safely hot, or sitting in the danger zone where bacteria are having a party.
The Two-Hour, Four-Hour Rule Explained
So, how do you manage food that inevitably enters the TDZ during a busy service? That’s where the two-hour/four-hour rule comes in. It’s a practical, time-tested guideline that gives kitchen staff a clear framework for making safety decisions on the fly.
Picture a pan of cooked chicken on a prep counter during the lunch rush. The kitchen is humming, and the chicken’s internal temperature has dropped below 140°F. This is when the clock officially begins.
Here’s how to apply the rule:
- Less Than 2 Hours: If the food has been in the TDZ for under two hours, you’re in the clear. You can safely pop it back in the cooler to get it below 40°F or reheat it to 165°F and serve it.
- Between 2 and 4 Hours: The food is still safe to serve now. But this is its last chance—it cannot be cooled and stored for later use. Once it’s served, any leftovers from this batch must be discarded.
- More Than 4 Hours: It’s done. Throw it out. No exceptions. After four hours, the bacterial load can be so high that even reheating might not destroy the heat-stable toxins some bacteria produce.
This rule is your kitchen’s safety net, but it only works with vigilant monitoring. It’s not about guesswork; it’s about knowing precisely how long every food item has been exposed.
A Threat at Every Stage
The Temperature Danger Zone isn’t just about food left on a counter. It’s a constant factor at every single point in your kitchen’s workflow, from receiving deliveries to plating the final dish.
Holding Hot and Cold Foods
This is where many kitchens drop the ball. A steam table that can’t quite hold 140°F or a salad bar that creeps up to 45°F is an open invitation for trouble.
- Hot Holding: Must stay at or above 140°F (60°C).
- Cold Holding: Must stay at or below 40°F (5°C).
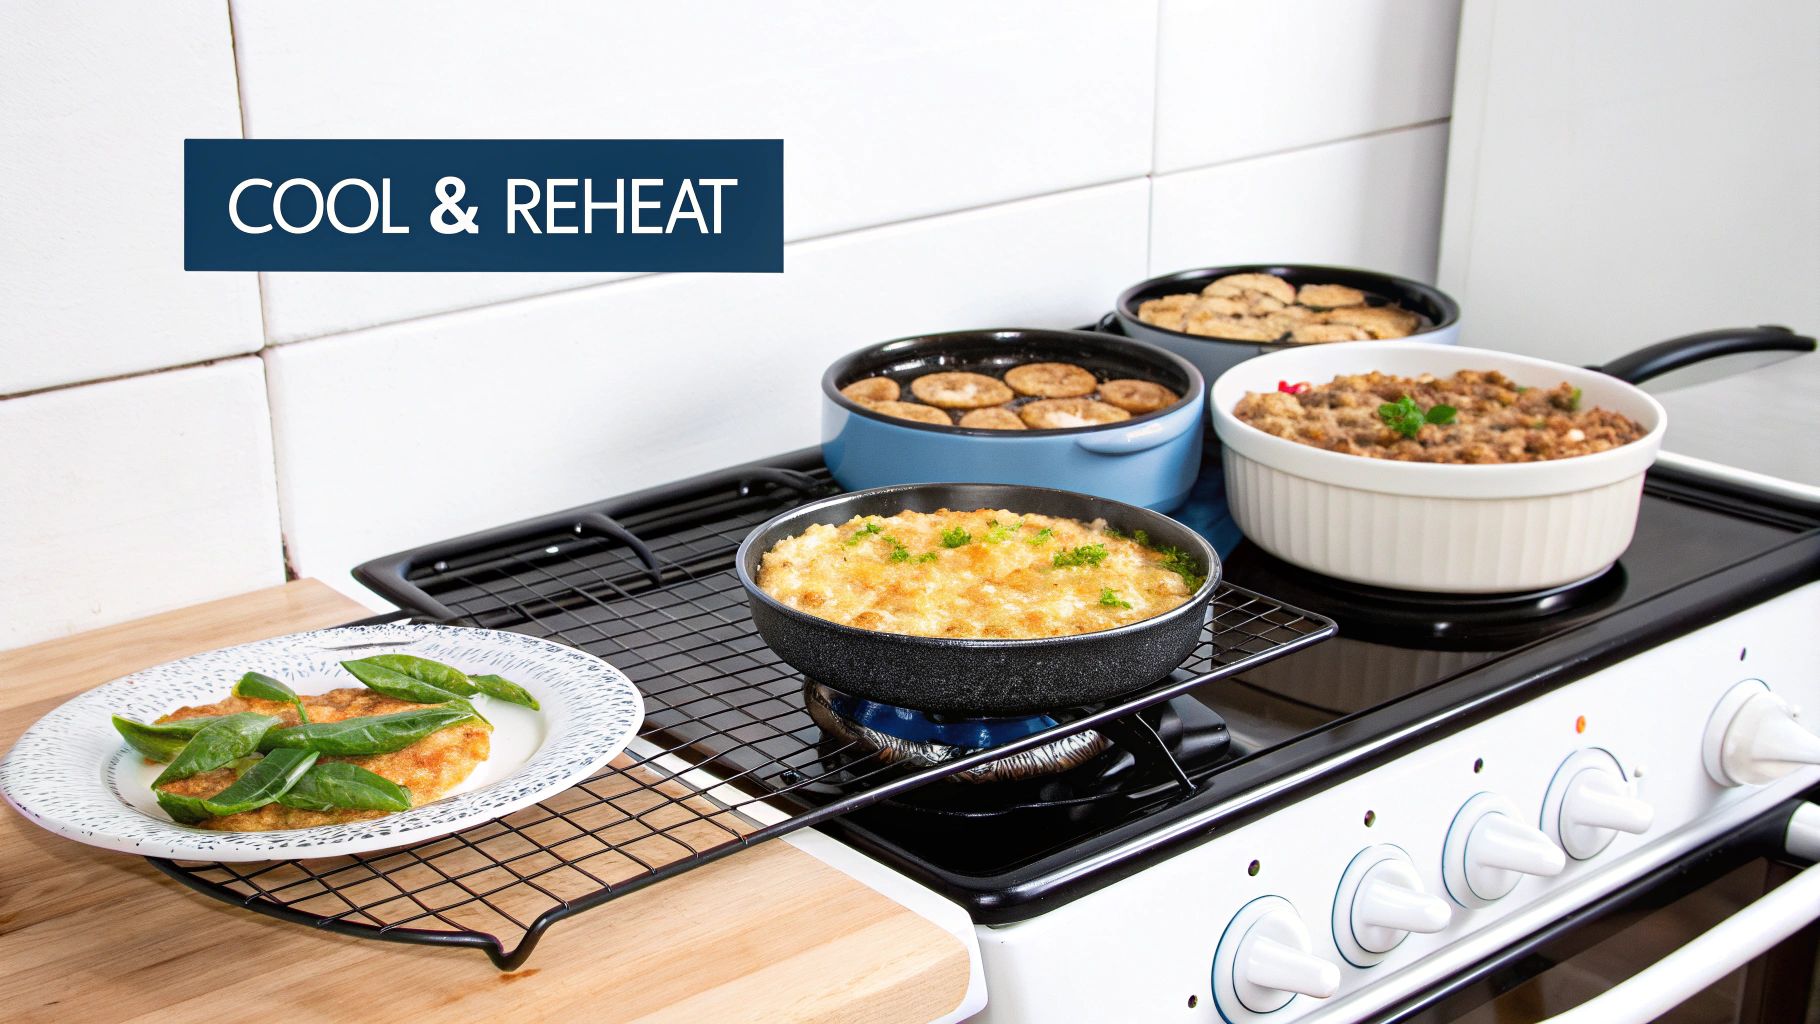
Cooling and Reheating
Moving food through the danger zone quickly is non-negotiable. A large stockpot of chili left to cool on the counter will spend hours in the TDZ. The proper procedure is a two-step process: cool from 140°F to 70°F within two hours, then from 70°F to 40°F within the next four hours.
When reheating, you have to be just as aggressive. Food must be brought back to 165°F (74°C) for at least 15 seconds to eliminate any bacteria that might have grown. For specific items, like burgers, using a precise guide is key. This Ultimate Burger Temperature Chart is a fantastic resource for hitting the exact internal temperatures needed for safety and quality.
Critical Temperature Benchmarks for Food Safety
To make this easier to remember, here is a quick-reference table with the most important temperatures you need to know. Think of it as your cheat sheet for keeping food safe from pathogens.
| Food Item or Process | Critical Temperature (Fahrenheit) | Critical Temperature (Celsius) | Purpose |
|---|---|---|---|
| Cold Holding | 40°F or below | 5°C or below | Slows bacterial growth significantly. |
| Hot Holding | 140°F or above | 60°C or above | Prevents bacteria from multiplying. |
| Ground Meat | 160°F | 71°C | Kills E. coli and Salmonella. |
| Poultry | 165°F | 74°C | Ensures destruction of Salmonella. |
| Fish & Seafood | 145°F | 63°C | Cooks fish thoroughly to kill parasites. |
| Reheating Leftovers | 165°F | 74°C | Eliminates bacteria grown during storage. |
Keeping this chart handy in the kitchen reinforces the golden rule: keep hot foods hot and cold foods cold. Mastering these numbers isn’t just about compliance—it’s about building a powerful, proactive food safety culture in your kitchen.
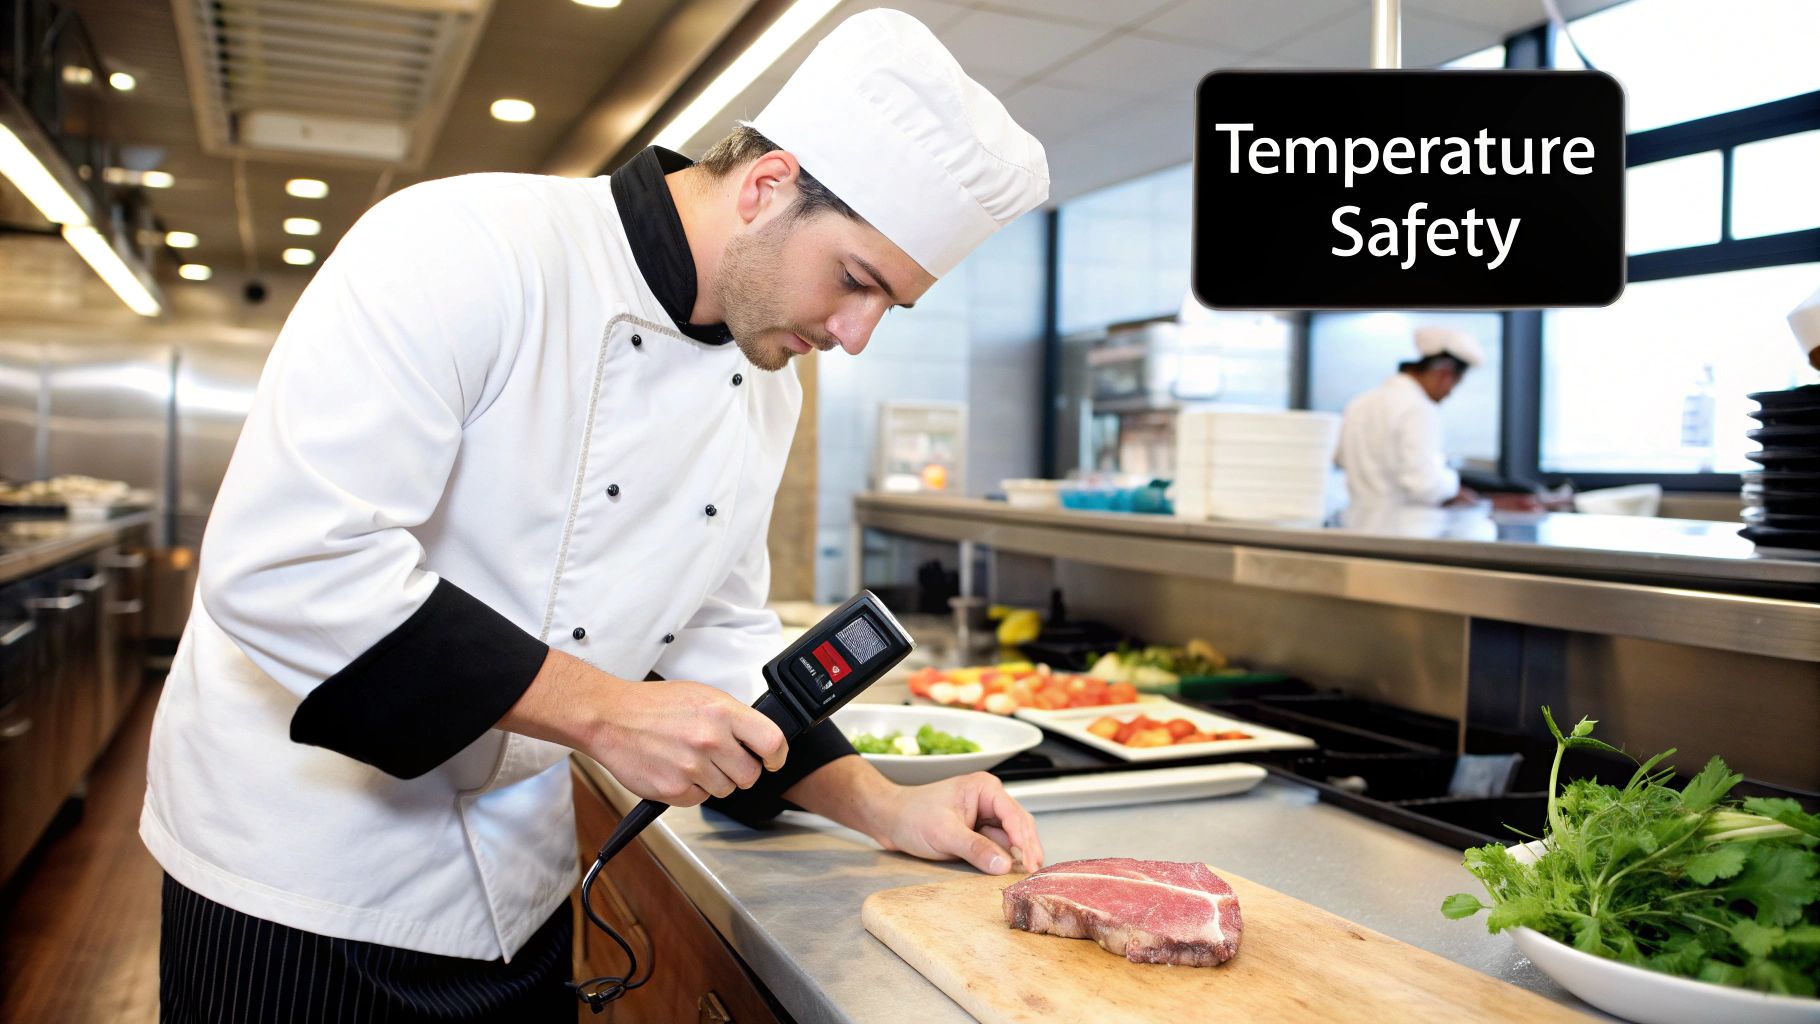
Your Essential Temperature Monitoring Toolkit
When it comes to food safety temperature control, you can’t afford to guess. Simply touching a container or judging by sight is a surefire path to trouble. Your thermometers are the most critical instruments in your kitchen, giving you the cold, hard data needed to protect both your guests and your business.
Building out your toolkit isn’t just about having a thermometer; it’s about having the right one for the right situation. Different tools are built for different jobs, and knowing which one to grab is key to getting an accurate read every time.
Choosing the Right Thermometer for the Job
Think of your thermometers like a chef’s knife collection—you wouldn’t use a massive cleaver for a delicate, paper-thin slice of fish. In the same way, the thermometer you trust for a thick prime rib is completely different from the one you’d use for a thin chicken cutlet or a pot of soup.
Bimetallic Stem Thermometers: These are the classic, dial-faced workhorses of the kitchen. They’re tough and affordable, perfect for checking the core temperature of thick foods like roasts or deep stockpots. Just remember, they average the temperature along the stem, so they aren’t the best choice for thinner items.
Thermocouples and Thermistors: These digital powerhouses give you a lightning-fast reading from a tiny sensor right at the tip of the probe. This precision makes them ideal for getting quick, accurate temps on things like hamburger patties and chicken breasts.
Infrared (Laser) Thermometers: These gadgets are all about speed and convenience, measuring surface temperature without making contact. They’re fantastic for a quick check of a soup on the steam table or the outside of incoming deliveries. But here’s the catch: they cannot measure internal temperature. Never, ever use one as a substitute for a probe thermometer to confirm doneness.
You might be surprised to learn how many kitchens are missing these basics. A recent study revealed that only 53.4% of restaurants surveyed actually had food thermometers available and in use. That’s a huge gap in a fundamental safety practice. You can dive deeper into these findings and what they mean for public health in the full research on restaurant safety practices.
The Art of Calibration: Tuning Your Instrument
An inaccurate thermometer is actually more dangerous than no thermometer at all. Why? Because it gives you a false sense of security. Calibration is the simple act of “tuning” your thermometer to make sure it’s telling you the truth. This is a non-negotiable task that needs to happen regularly, especially after a thermometer is dropped or gets exposed to a wild temperature swing.
Think of calibration like tuning a guitar before a concert. If the instrument is out of tune, every note it plays will be wrong. An uncalibrated thermometer gives you bad data, leading to potentially dangerous food safety decisions.
Luckily, there are two easy, industry-standard methods you can use to calibrate your thermometers right in your own kitchen.
How to Calibrate Using the Ice-Point Method
This is the most popular and safest way to get the job done. It’s fast, reliable, and uses equipment you already have.
Prep the Ice Bath: Grab a large glass and fill it to the brim with crushed ice. Now, add just enough cold water to fill in the gaps—you want a thick slush, not a glass of ice water. Let it sit for a minute to stabilize.
Insert the Thermometer: Submerge the probe or stem at least two inches deep into the ice slush, making sure it doesn’t touch the sides or bottom of the glass.
Wait and Adjust: After 30 seconds, the thermometer must read exactly 32°F (0°C). If it’s off, use a small wrench (or the tool often built into the thermometer’s sheath) to turn the calibration nut until the needle points perfectly to 32°F.
Beyond Manual Checks: Automated Monitoring
While consistent manual checks are the backbone of food safety, modern tech offers a powerful backup. Digital data loggers are small devices you place inside refrigerators and walk-ins that act as a 24/7 watchdog, constantly monitoring and recording temperatures.
These automated systems give you a continuous stream of data and can even send an alert straight to your phone if a unit veers out of its safe temperature zone. This means you can take action before a small problem becomes a catastrophic loss of inventory. Of course, this tech is only as reliable as the equipment it’s monitoring. Keeping your appliances in top shape is crucial, and you can learn more in our guide on the importance of regular commercial appliance maintenance for food safety.
By blending reliable hands-on tools with smart automated systems, you build a truly bulletproof defense against temperature-related risks.
Building Your HACCP Temperature Control Plan
Knowing the numbers is one thing, but putting them into practice on a busy Saturday night? That requires a solid game plan. This is where a HACCP (Hazard Analysis and Critical Control Points) plan comes in. Think of it less like paperwork and more like your kitchen’s playbook for food safety. It’s a smart, proactive system designed to spot and stop temperature-related risks before they ever have a chance to become a problem.
At its heart, HACCP is about zeroing in on the specific moments in your food’s journey—from the back door to the customer’s plate—where temperature control is absolutely crucial. By focusing your attention on these high-stakes steps, you create a powerful and efficient defense against foodborne illness. It’s truly about working smarter, not just harder, to make sure every dish is safe.
Identifying Your Critical Control Points
First things first: you need to walk through the entire lifecycle of an ingredient in your kitchen. Where are the moments that a temperature slip-up could turn a great dish into a health hazard? These are your Critical Control Points (CCPs), the make-or-break checkpoints in your food safety system.
Here are some of the most common temperature CCPs you’ll find in almost any kitchen:
- Receiving: That case of chicken just arrived. Is it below 41°F? Checking it at the door is your first and best chance to prevent a problem from ever coming inside.
- Cold Storage: Are your walk-in and low-boy refrigerators actually holding at the right temperature, or are they creeping up during busy shifts?
- Thawing: How are you thawing frozen items? Hopefully, it’s safely in a fridge or under cold running water, not just sitting on a prep counter in the danger zone for hours.
- Cooking: Is every piece of fish, chicken, and beef being cooked to the correct internal temperature to destroy harmful bacteria?
- Hot & Cold Holding: On the service line or in a buffet, are your hot foods staying above 140°F and your cold foods staying below 41°F?
Managing these points effectively hinges on having the right gear. As you map out your HACCP plan, investing in reliable equipment like commercial refrigerated prep tables isn’t just a purchase; it’s a foundational part of your kitchen’s safety infrastructure.
Setting Non-Negotiable Critical Limits
Once you’ve flagged your CCPs, you need to set critical limits for each one. These are the bright, clear lines that separate safe from unsafe. There’s no room for interpretation here; food is either within its limit or it isn’t.
For example, a CCP of “Cooking Chicken” has a critical limit of 165°F for 15 seconds. For the CCP of “Cold Holding,” the limit is 41°F or below. These aren’t just good ideas—they are the absolute minimum or maximum values you must hit to keep food safe.
A HACCP plan without clear critical limits is like a map without a destination. It gives you no way of knowing if you’ve actually arrived at a state of safety. These precise numbers are the foundation of your entire temperature control strategy.
Monitoring Procedures and Corrective Actions
With your CCPs and limits locked in, the next step is to create simple, repeatable monitoring procedures. This means deciding who checks the temperature, what they check, when they check it, and how they record it. It could be as simple as having a line cook temp the soup on the steam table every hour with a calibrated thermometer and initial a log sheet.
But let’s be realistic—things go wrong. That’s why every CCP needs a pre-planned corrective action. What happens when that soup is at 130°F? The corrective action should be automatic: “Reheat soup to 165°F immediately and record the action.” This takes the guesswork out of a stressful situation and ensures the response is fast, consistent, and safe.
Your HACCP plan ties all your temperature control efforts together into one cohesive system. But this system is only as good as the equipment it relies on. That’s why a rock-solid commercial kitchen equipment maintenance plan isn’t just an extra task—it’s essential for making sure your HACCP strategy actually works.
Avoiding Common Temperature Control Mistakes
Knowing the rules of food safety temperature control is one thing. Actually putting them into practice, day in and day out in a chaotic kitchen, is a completely different ballgame. Even the most seasoned teams can slip into bad habits. Let’s pull back the curtain on the most common errors we see in the field and give you clear, practical ways to fix them.
Think of these mistakes as tiny cracks in your kitchen’s defenses. A single one might not seem like a big deal, but they can quickly lead to a major food safety failure. The key is to make spotting and correcting them a daily reflex for your entire team.
The Overloaded Cooler Catastrophe
We’ve all seen it: a walk-in cooler or refrigerator packed so tightly you can barely close the door. It’s tempting to squeeze every last bit of product in there, but you’re actually creating a massive safety risk. When a cooler is crammed full, cold air can’t circulate properly, leading to dangerous warm spots where bacteria can have a field day.
Picture the cold air as a river trying to flow through a room. If the room is cluttered with furniture, the water can’t reach every corner. It’s the same in your cooler. This poor airflow means some of your food might never drop to a safe temperature below 41°F, even if the thermostat says everything is fine.
To keep the air moving and the food safe, stick to these simple rules:
- Give It Room to Breathe: Always leave space between food containers and between items and the cooler walls.
- Don’t Block the Fans: This is a big one. Never stack boxes or anything else directly in front of the cooling fans.
- Choose Open Shelving: Whenever you can, use wire or slotted shelves. They allow cold air to circulate from top to bottom far better than solid surfaces.
Of course, a well-organized cooler won’t help if the unit itself is on the fritz. Regular upkeep is non-negotiable, and you can get a head start with our guide on 5 essential maintenance tips to keep your commercial kitchen appliances running smoothly.
Neglecting to Temp Incoming Deliveries
Your food safety program has to start the second that delivery truck backs up to your door—not when the ingredients are on the prep table. A huge mistake kitchens make is simply accepting deliveries without checking the temperature of the products. When you do that, you’re blindly trusting that the entire cold chain was handled perfectly before it got to you.
That’s a huge gamble to take. A single pallet of chicken sitting on a warm loading dock for just 30 minutes can easily creep into the temperature danger zone. If you accept it without checking, you’ve just invited a major problem right into your kitchen.
The receiving door is your first and most important checkpoint. Treating it as an afterthought is like leaving your front door unlocked; you’re inviting trouble inside.
The solution is straightforward: your receiving team needs a calibrated thermometer in hand for every single delivery. They must be trained to temp all temperature-sensitive foods as they come off the truck. Any product that isn’t in the safe zone—like cold items above 41°F—must be rejected on the spot. No exceptions.
Using Unsafe Thawing Methods
How you thaw frozen food is just as important as how you cook it, but this step is often where things go wrong. The most dangerous and common mistake is leaving frozen food, like a case of ground beef, on a countertop to thaw at room temperature. The surface of the food thaws quickly and spends hours sitting squarely in the danger zone while the inside is still a block of ice.
Safe thawing just takes a bit of planning. There are only a handful of approved ways to do it right:
- In the Refrigerator: This is the gold standard. It’s slow and requires you to think ahead, but it guarantees the food stays at a safe temperature the entire time.
- Under Cold Running Water: Need it faster? Place the food in a sealed, leak-proof bag and submerge it under cold, running water (70°F or below). The water has to be running to continuously wash away surface bacteria.
- As Part of Cooking: Some foods, like burger patties or certain vegetables, are designed to be cooked directly from their frozen state. This moves them through the danger zone quickly and safely.
By making these practices a standard part of your kitchen’s routine, you can shut down some of the most common—and most hazardous—temperature control mistakes for good.
Your Action Plan When Temperatures Go Wrong
Even the most diligent monitoring can’t prevent equipment failure. A cooler compressor can die overnight, or a steam table can give out right in the middle of a chaotic lunch rush. When this happens, panic is your worst enemy. A solid, pre-planned corrective action plan transforms a potential crisis into a manageable hiccup.
This isn’t about scrambling for a fix while your kitchen crew stands around wondering what to do. It’s about having a clear, step-by-step playbook that empowers your team to make safe, decisive choices when the pressure is on. Every single person on your staff should know exactly what their role is the moment a temperature log shows a reading in the danger zone.
Immediate Steps for Temperature Deviations
The second a temperature reading is off, the clock starts ticking. Your first response needs to be fast, deliberate, and documented. Whether it’s a walk-in cooler sitting at a balmy 45°F or a hot-holding unit that’s dropped to 130°F, what your team does next is critical for protecting both your guests and your bottom line.
Your emergency protocol should be simple and direct. Here are the core steps:
- Isolate the Food: The very first move is to separate any food that has been in the danger zone. Get it away from everything else so there’s zero chance it gets served.
- Alert a Manager: The person who finds the problem needs to notify the manager on duty immediately. No exceptions.
- Document Everything: Grab your log and write it all down: the time, the specific food, the incorrect temperature, and who found it.
- Figure Out the Time: This is the million-dollar question: How long has this food been sitting at an unsafe temperature?
When it comes to food safety, your guiding principle should always be: “When in doubt, throw it out.” If you can’t say for sure how long a potentially hazardous food has been in the danger zone, it has to be discarded. A few hundred dollars in lost product is nothing compared to the devastating cost of a foodborne illness outbreak.
Deciding When to Save and When to Discard
This decision is all about time and temperature. Your action plan needs to spell out exactly what to do based on the classic two-hour/four-hour rule.
Let’s say a prep fridge goes down and you find TCS foods at 48°F. The first thing you need to figure out is when it went out of range. If your temperature logs show it was fine less than two hours ago, you can probably save the food by moving it to a working cooler or using a blast chiller to get the temperature back down quickly.
But if that same cooler was last checked four hours ago? You’re in the dark. You have no way of knowing if the food has been unsafe for 20 minutes or the full four hours. In that situation, discarding the product is the only responsible choice.
Make sure to document every single corrective action—what you tossed, why you tossed it, and the steps taken to fix the equipment. This turns a costly mistake into a powerful learning experience that strengthens your entire food safety system.
Common Questions We Hear in the Kitchen
Even the most seasoned chefs and managers run into questions about temperature control. It’s perfectly normal. Getting straight answers is key to making sure your entire team feels confident about food safety, day in and day out. Here are a few questions that pop up all the time.
What Is the Single Most Important Temperature Rule?
If you remember just one thing, make it this: keep food out of the ‘Temperature Danger Zone,’ which is between 40°F and 140°F. This is the temperature range where bacteria throw a party and multiply like crazy.
Everything we do in food safety circles back to this one principle. Cold food stays cold (below 40°F), and hot food stays hot (above 140°F). If your team truly understands and respects the danger zone, you’ve already won the biggest part of the fight against foodborne illness.
How Often Should We Really Be Calibrating Thermometers?
You should be checking your thermometers at least once a week. Make it part of your routine.
But, you also need to calibrate them immediately if one gets dropped, goes from a hot oven to a cold freezer, or just seems to be giving you a weird reading.
Think of it this way: an uncalibrated thermometer is basically lying to you. Regular calibration ensures the numbers you’re trusting to keep people safe are actually correct.
Can We Use the Same Thermometer for Raw Chicken and a Cooked Steak?
Technically, yes, if you perfectly clean and sanitize it every single time. But in the real world of a busy kitchen, that’s a huge risk.
The best practice, by far, is to use separate, color-coded thermometers. One for raw, one for cooked. It’s a simple, visual system that acts as a powerful guard against cross-contamination. You completely remove the chance of someone accidentally transferring nasty pathogens from raw meat to a ready-to-eat dish during a hectic dinner rush.
What’s the Right Way to Cool a Giant Pot of Chili?
Whatever you do, don’t just shove a massive, steaming-hot pot straight into the walk-in cooler. That’s a classic mistake. It will act like a space heater, raising the temperature of the whole cooler and putting all your other food at risk. Plus, the chili itself will cool way too slowly, spending hours in the danger zone.
To get food cooled down safely and quickly, you have to be proactive. Here are the go-to methods:
- Use an Ice Paddle: These are designed specifically for this. You stick it in the middle and it cools the product from the inside out.
- Give it an Ice Bath: Place the smaller pot of chili into a larger container or a clean sink filled with ice and water. The key here is to stir the food often to help it cool evenly.
- Break it Down: The fastest way is to divide the large batch into several smaller, shallow metal pans. More surface area means faster cooling.
These techniques are non-negotiable for proper food safety temperature control and ensure you hit your required cooling times.
When your kitchen’s refrigeration goes down, time is money—and inventory. For fast, expert commercial appliance repair in the Phoenix Metro Area, you can count on the team at Ice Age Refrigeration. Don’t let a broken cooler or freezer jeopardize your business. Schedule your service today and get back to business.
Article created using Outrank